It took a lot of trial and error, because while I loosely based it on a craftster tutorial, I was pretty much making it up as I went along, which makes me even more pleased with the results.
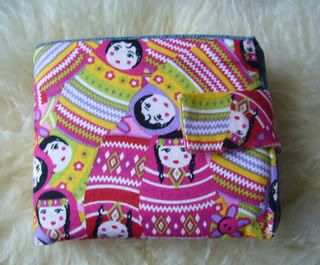
I used a discount print I found at Joanne's which I think is really charming, plus I had enough of it not to worry about wasting it with all my trial and error.
Anyway, without further ado, pictures:
front of the wallet:
opened:
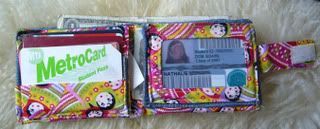
3 card pockets, 1 clear ID pocket, two misc pockets (where the papers are sticking out) and of course, the cash money pocket.
inside the cash pocket:
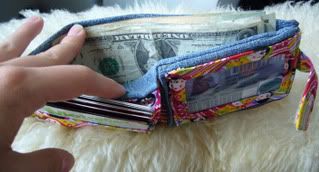
and the part I'm proudest of (and what my last wallet was really lacking)- the zippered coin pocket on the back:

It proved quite useful in Berlin, especially since 1 and 2 euro are coins!
Since returning from my trip I've gotten right back on the crafting circuit.
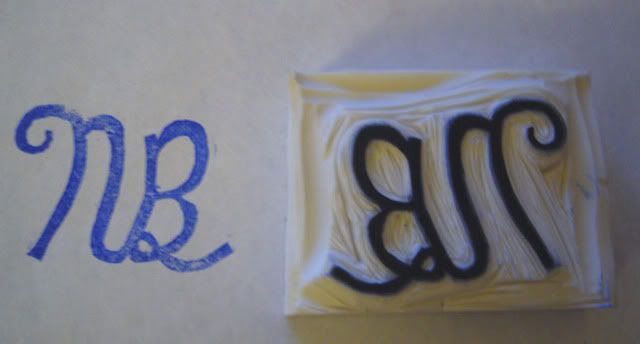
Most recently I carved an "initial stamp" which I plan to be offering in craftster's SSS round 10. I'm so excited! :)
Anyway, goodies from my trip to follow soon, along with the final transformation of a WIP to a KIP which I know you've all been waiting for ;) haha


2 comments:
ohhhh glad that you're back.
AWESOME wallet. The design is super cute. I'm surprised you got it at Joann's. :)
Thanks, I was slightly surprised too, especially since I love the awesome, expensive, Matryoshka prints on superbuzzy. Joann's can be really great and surprising sometimes though!
Post a Comment